Kandao VR Cam User Guide

1. Get to Kow the Kandao VR Cam

(1)Camera Introduction

(2)Tech Specifications

2. Packing List

3. Install Camera

4. Network Connection Methods

(1)LAN with Router

(2)DHCP Directly

5. Adjustment of Camera Components Before Live Streaming

Kandao Stream Software User Guide

1. Software Download and Configuration Requirements

2. Software Functions Introduction

(1)Menu Bar & Local Streaming

(2)Connect the camera and check its status

(3)Modify Camera Parameters

(4)Preview Mode Switching

(5)Real-time Adjustment Panel

3. Start Live Streaming

Frequently Asked Questions

1. What should I do if the live stream appears blurry?

2. What should I do if there is no sound in the live stream?

3. Is it normal for the camera to get hot?

4. What should I do if the image is abnormal?

(5)Real-time Adjustment Panel

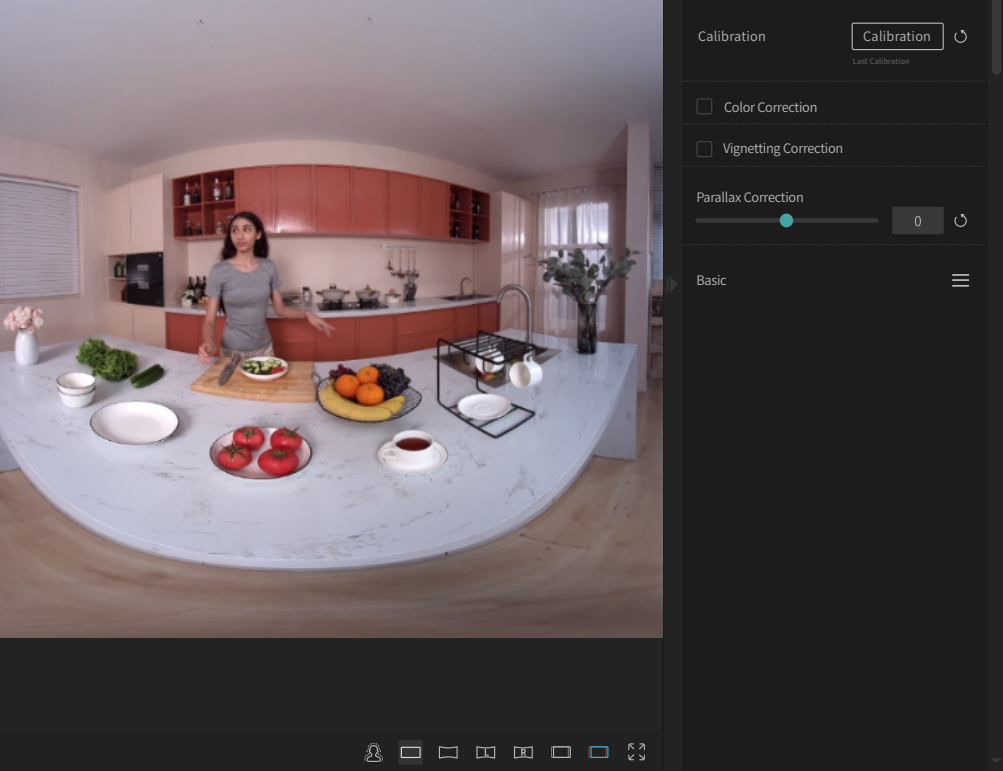
  In Real-time Adjustment panel, you can dynamically modify the perspective and color of the image, as well as adjust the parallax between the left and right eyes. Below is an introduction to each module. You can collapse or expand the corresponding effect panel by clicking the "arrow" button.


  (1)Histogram

  Under the histogram panel, you can view real-time histogram information for the entire image. Clicking on the corresponding buttons toggles the display of the histogram information for brightness (B), red (R), green (G), and blue (B) channels.
 

(2)View

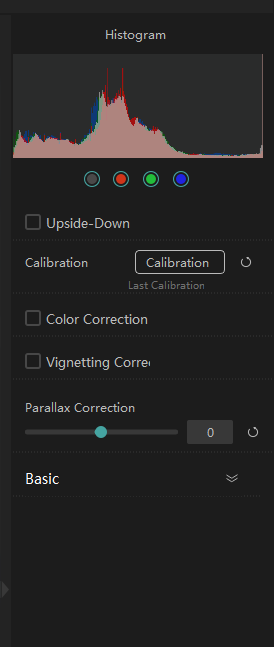
  Under the view panel, you can perform actions such as 180° rotation, calibration, correction, and adjustment of the left and right eye disparities.


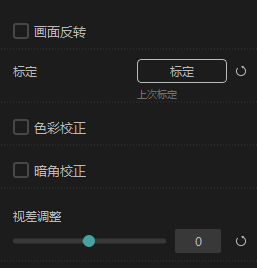
  Here is a detailed introduction to the functions under the View panel:

Function Name
Function Description
Flip Screen
Invert the screen upside down, suitable for inverted camera live streaming, such as mounting the camera on the ceiling.
Calibration
Calibrate the installation tolerance between the camera and lens to avoid vertical disparity.
Color Correction
Correct slight color differences between the two lenses caused by external factors.
Vignette Correction
Compensate for the inevitable edge vignetting produced during lens design and manufacturing.
Disparity Adjustment
Adjust the zero disparity point in the 3D image for a better 3D effect.
  Calibration:For the initial use on a new computer, it is necessary to calibrate the camera before the official live broadcast. Calibration is only required on the first use or when changing computers; it is not necessary thereafter.

 Calibration Environment Requirements and Steps:

  • There should be no obstructions within 1.5 meters in front of the lens.
  • There should be no large areas of solid color or highly reflective surfaces such as glass or mirrors in front of the lens.
  • Click the "Calibration" button on the right side of the interface, and the software will automatically complete the calibration process.
     

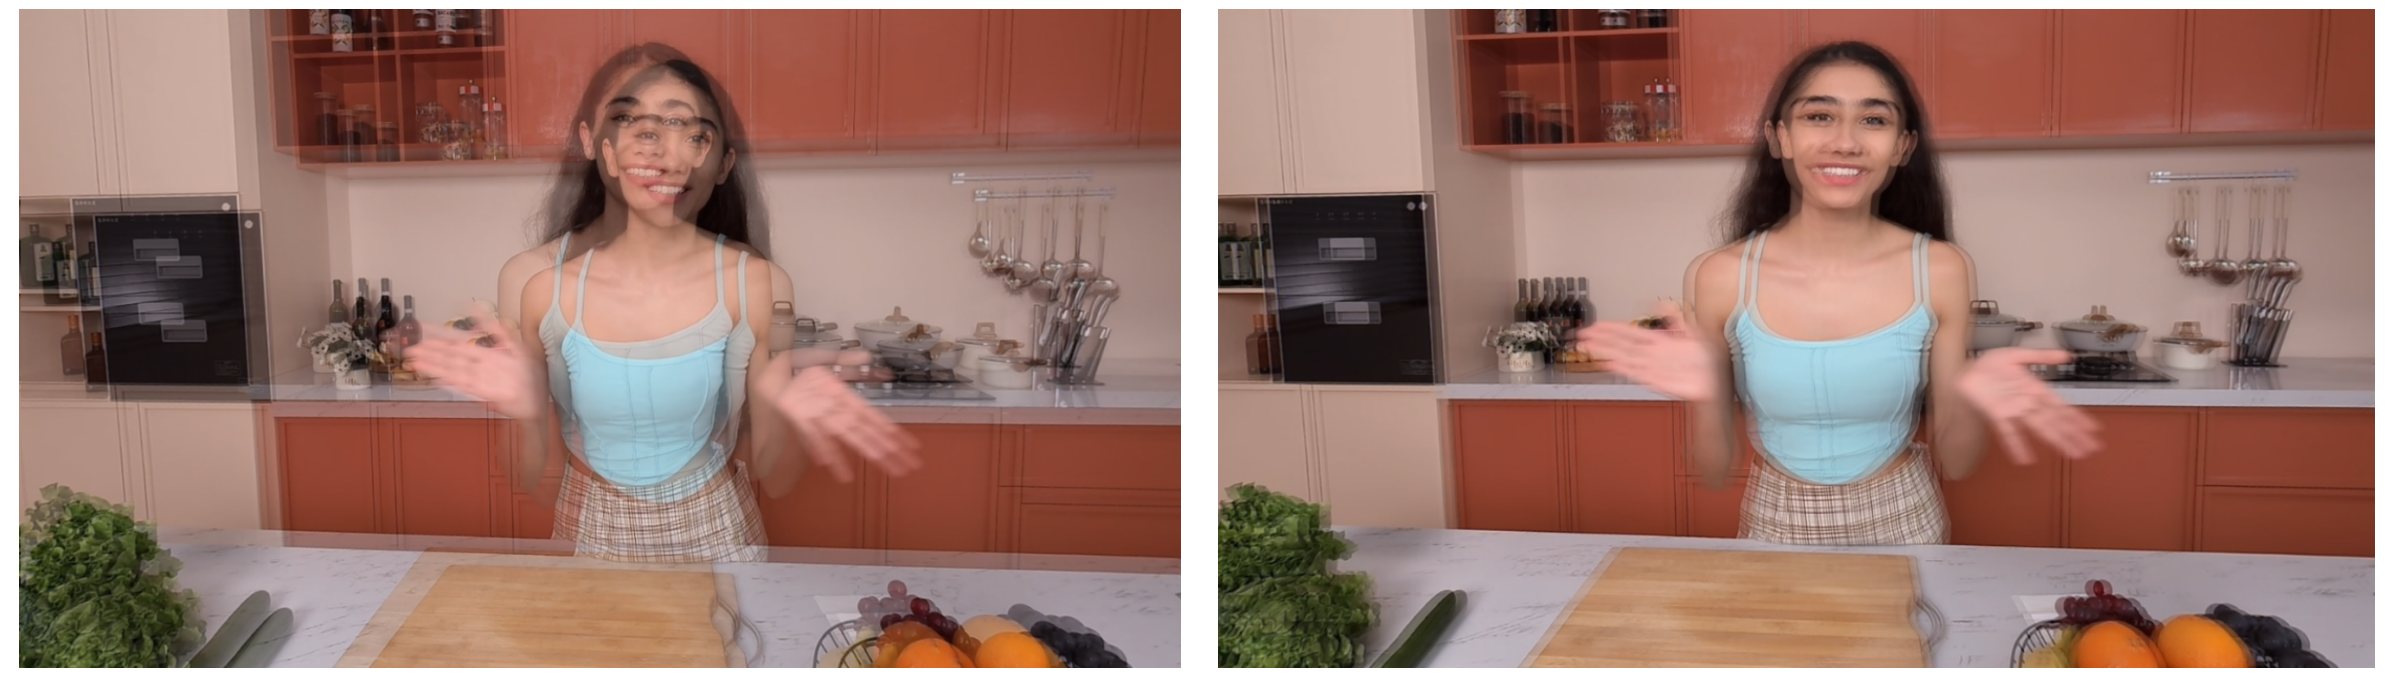
Check the Calibration Result: Switch the preview mode to "Overlap VR" mode and view the front-facing image. If there is no vertical disparity in the image, the calibration is complete.Comparison before and after calibration:

(3)Basic

  This Panel includes primary tools for adjusting the screen, such as white balance, color saturation, and hue levels.
 
Feature Name
Feature Description
Temp
Adjusts the overall warmth or coolness of the image; negative values represent cool tones, and positive values represent warm tones.
Tint
Adjusts the overall color of the image; negative values represent green, and positive values represent magenta.
Exposure
Meaning: Exposure adjustment controls the overall brightness level of the image. Effect: Increasing exposure brightens the image, while decreasing exposure darkens it.
Contrast
Meaning: Contrast adjustment controls the difference in brightness between light and dark areas of the image. Effect: Increasing contrast enhances the clarity of brightness differences, while decreasing contrast makes brightness areas more similar.
Highlights
Meaning: Highlights adjustment controls the representation of details in the bright areas of the image. Effect: By adjusting highlights, you can recover or reduce details in overexposed bright areas.
Shadows
Meaning: Shadows adjustment controls the representation of details in the dark areas of the image. Effect: By adjusting shadows, you can recover or reduce details in excessively dark areas, adding more definition to shadows.
Whites
Meaning: Whites adjustment controls the brightness of the brightest parts of the image. Effect: Adjusting whites can influence the brightest parts of the image, making them purer white or softer.
Blacks
Meaning: Blacks adjustment controls the brightness of the darkest parts of the image. Effect: Adjusting blacks can influence the darkest parts of the image, making them purer black or more muted.
Saturation
Meaning: Saturation refers to the intensity of colors in the image. High saturation indicates more vivid colors, while low saturation makes colors appear more muted. Effect: Saturation adjustment affects the vividness of all colors in the image. Increasing saturation makes colors more vibrant, while decreasing saturation creates a more subdued and soft appearance.
Vibrance
Meaning: Vibrance is a relative adjustment to color saturation. It intelligently increases color saturation but focuses more on less saturated colors to prevent oversaturation of already relatively vibrant colors. Effect: Vibrance adjustment helps make the image look more natural by avoiding excessive saturation, particularly crucial for preserving key elements like skin tones.

Did this information help you?